I love simple tools that reveal surprising motion, and a three-card flipbook is one of my favourite pocket-sized experiments. It’s small, fast to make, and brilliantly instructive for beginners learning about timing, keyframes and how slight changes convey weight and personality. In this tutorial I’ll walk you through designing a three-card flipbook that teaches timing and character motion — from the first sketches to the final flip — and share the little tricks I use when I teach workshops.
Why a three-card flipbook?
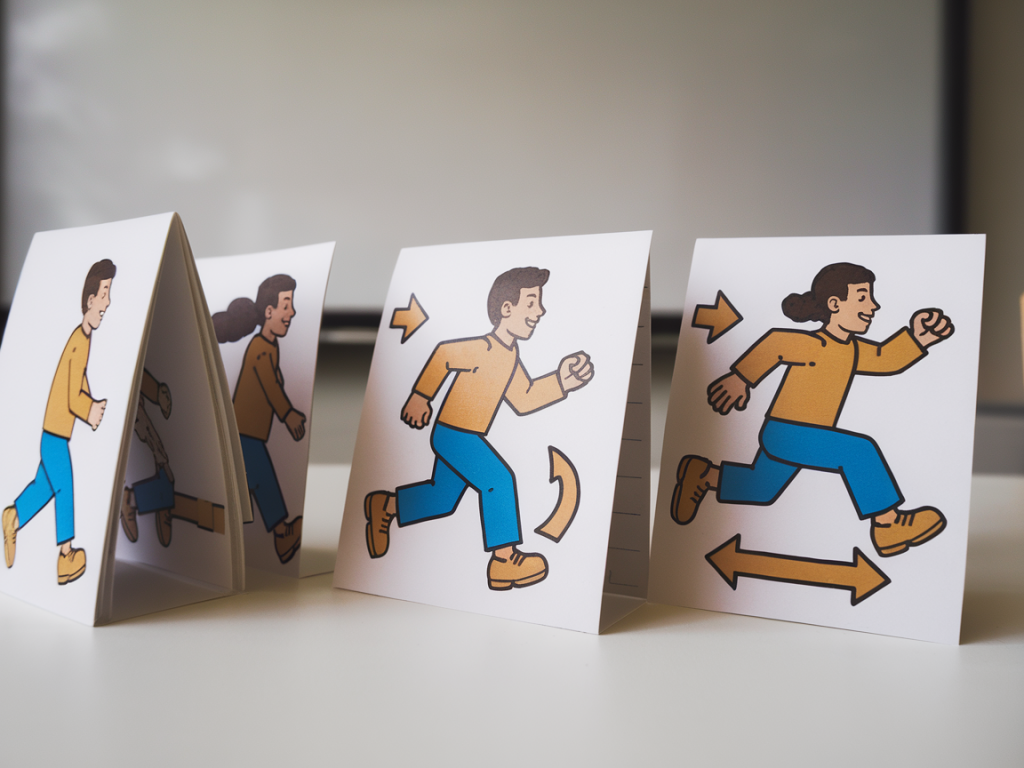
One might think three frames is too few to show anything interesting. That’s the point. With a strict limit, you’re forced to distil motion to its essentials: the starting pose, the ending pose, and the in-between that sells the action. This makes three-card flipbooks an excellent exercise for understanding timing (how long a motion feels) and pose-to-pose acting (how a character’s identity comes through movement).
Materials
Three pieces of card roughly the same size — I use 90–180gsm card cut to 10 × 7 cm (you can use playing cards or index cards)Pencil, eraser, fine-liner or felt-tip pen (e.g., Sakura Pigma Micron or Uni Pin)Lightbox or bright window (optional but useful for tracing)Paper clips, bulldog clip or small binder clip to hold the stackRuler and craft knife / scissors for trimmingOptional: coloured pencils, gouache or marker for quick colour accentsIf you use commercially printed playing cards (like Bicycle), they’re already a perfect size and delightfully tactile — great if you’re making many prototypes in a workshop.
Core concepts to keep in mind
Key poses: With three images you have two keys (frame 1 and frame 3) and one breakdown (frame 2). Make the keys distinct.Timing: When you flip cards by thumb, each card shows for roughly the same moment — you control perceived speed by how quickly you flip. But you can also imply different speeds by where you place the breakdown relative to the keys (closer to start or end).Silhouette: Make each pose readable in silhouette. A strong silhouette sells motion even when the drawings are tiny.Follow-through and anticipation: Even in three frames you can hint at anticipation (a lean back) or follow-through (a bit of drag in the limbs) to make motion convincing.Step-by-step process
I’ll describe a simple action: a little character waving and snapping their hat down — a playful two-part motion that teaches timing and character.
Prepare your cards. Cut three identical rectangles. Keep one as the background/anchor card if you want — I often reserve the bottom card as a stable base (it’s the card you hold while flipping the other two).Sketch the first key pose. This is your starting pose. For my waving character, frame 1 is standing neutral with hat tilted slightly upward. Keep the lines light; you’ll refine later. Focus on silhouette and centre of gravity — where is the weight? If the character leans left, show the supporting leg clearly.Sketch the third key pose. This is the end of the action. For my example, frame 3 is hat pressed down over the character’s eyes, a cheerful snap. Make this pose read clearly against frame 1 — exaggeration helps.Find the breakdown (frame 2). The middle card bridges the two extremes. Here you decide the timing feel. Place the breakdown closer to the start for a “fast finish” (quick snap at the end). Place it closer to the end for a “slow start, quick finish”. In my hat snap I put the breakdown almost halfway but slightly closer to the end to create a small buildup then a snappy finish.Use a lightbox or window to align proportions. Trace the head and body landmarks (eyes, shoulders, hips) across cards so the motion reads as a coherent sequence. I usually draw a faint baseline on each card to keep feet level unless I want a hop.Refine lines and add personality. Now that spacing feels right, go over the sketches with a darker line. Add features that define character — a crooked nose, a bob haircut, a scarf that swings. Keep details minimal; they should support motion, not clutter it.Add small secondary motion cues. Even tiny details convey momentum: a scarf trailing behind across the three frames, a hat brim tilting, an eyebrow quirk. For example, if the scarf moves a bit more in frame 3 than frame 1, it implies follow-through.Test, test, test. Hold the bottom card, flick the top two cards with your thumb and watch the sequence. Don’t flip like a machine gun at first; let the cards pass naturally. Observe what reads and what doesn’t. If the motion feels flat, exaggerate the keys or move the breakdown.Adjust timing by adding duplicates. If you want a part of the motion to linger, you can duplicate a card (draw the same pose on more than one card) or add an in-between by cutting a fourth card. The three-card limit is a teaching tool, but there’s flexibility if you want to emphasize a beat.Common questions I hear in workshops
How do I make the motion smooth with only three frames? Smoothness comes from clear, decisive changes in pose and consistent spacing of movement. Small, evenly spaced shifts imply steady motion; uneven spacing creates acceleration or deceleration.My flipbook looks jerky — what’s wrong? Often the problem is inconsistent landmarks (head jumps left-right) or a poorly considered silhouette. Re-align proportions across frames and ensure each pose flows logically into the next.How can I teach character with so few frames? Use exaggeration and small identifying details. A slumped shoulder, a raised eyebrow, or the way a hat is tipped can communicate mood instantly. Also consider the timing: a slow, reluctant movement reads differently from an eager, quick one.Variations and challenges
Make the middle frame the “surprise” — have frame 2 show a comedic pause or reveal to teach anticipation.Try different tempos: create one set where the breakdown is near the start, one where it’s central, and one near the end. Compare how the same two keys read differently.Use colour to teach visual continuity — paint the background across the three cards so the character is clearly anchored in space.Create a series: design a small flipbook deck where each triplet explores a single motion (walk cycle, nod, bow). This is great for teaching iterative practice.Teaching tips I use
Encourage students to work small and quick. Short sessions force decisive choices and reduce attachment to perfection.Start with silhouettes only. If the shape reads in black, it will read in detail.Remind learners that the thumb flip is part of the performance. How you flip affects perceived timing; try flipping slower or faster and watch how the action changes.Collect examples. Keep a folder of successful three-card flips to show the range of expression possible with minimal frames.Three-card flipbooks are a playful, low-pressure way to learn animation basics and character motion. I bring them to workshops because they demand economy of thought and reward bold choices — and because they’re simply fun to flick through. If you make one, I’d love to see it: share a photo or a short video on social and tag @MaxTheMagician or drop it into the contact form on my site — I’m always curious what people invent from three tiny pieces of card.