I love small mechanical surprises — the ones that make you tilt your head and grin. This coin‑hidden pop‑up is one of my favourite tiny tricks: a simple paper mechanism that hides a coin (or small token) and, when you spin it, reveals a tiny illustration in a playful flick. It’s tactile, cheap to make, and invites people to lean closer. Below I’ll walk you through the materials, a clear step‑by‑step build, troubleshooting tips, and a few variations you can try to make it your own.
Why this project works
There’s something irresistible about an object that promises one thing and delivers another. The secret here is a rotating bed that carries a coin beneath a flap while an illustrated panel rotates into view. Because the motion is compact and the pieces are small, the reveal feels magical — like a pocket theatre condensed into a palm. I designed this with humble materials in mind: paper, a brass fastener or split pin, and a bit of glue. You can make it in an evening and customise it endlessly.
Materials and tools
- Sturdy card stock (for base and rotating bed) — around 200–300 gsm works well
- Lighter paper or tracing paper (for the flap/veil)
- A small coin, washer, or flat disc (the “hidden” object)
- Brass fastener / split pin / small rivet
- Precision craft knife (X‑Acto) and cutting mat
- Ruler and pencil
- PVA glue or a glue stick, and double‑sided tape
- Bone folder or something to score folds neatly
- Colouring materials — pens, watercolour, gouache, coloured pencils
- Optional: small spring or elastic for added resistance
Template and sizes
I usually work at a palm‑sized scale: a base about 80 mm × 60 mm, with a rotating disc around 40 mm in diameter. But feel free to scale up. If you’re making multiples for cards or zines, sketch a template onto scrap card first. The key dimensions are the diameter of your rotating bed (D) and the radius of the coin space (d). Make sure D is large enough to carry the coin fully beneath the flap when hidden, and to rotate so the illustrated window lines up when revealed.
Step‑by‑step build
Here’s how I make mine. Work slowly — precision helps the motion feel smooth.
Cut the base and rotating bed
- Cut the base rectangle from card stock. Mine is 80 × 60 mm.
- Draw a circle for the rotating bed in the centre (around 40 mm diameter). Cut the circle out of a separate piece of card stock — this will be your rotating disc.
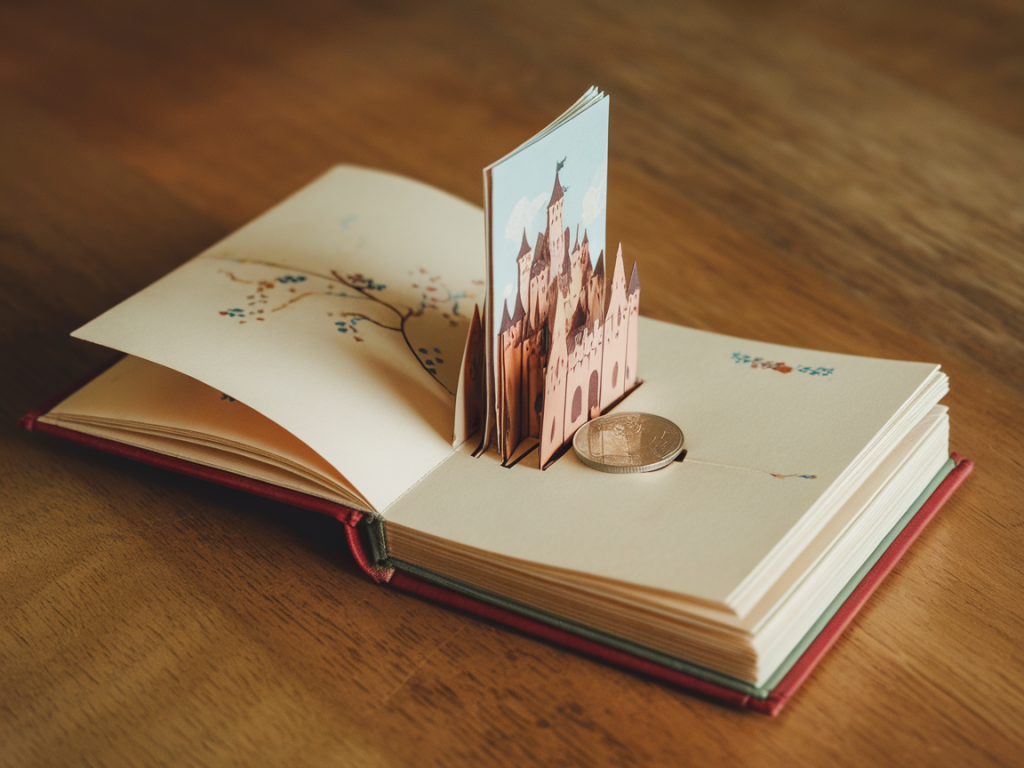
- On the base, mark the centre point and a shallow slot where the disc will peek through when rotated. The slot acts as the “window” that reveals the illustration. I usually cut a crescent‑shaped window about 20 mm wide.
Make the coin well and masking flap
On the underside of the rotating disc (or on the base under the disc), glue a thin ring or spacer to create a small well so the coin sits slightly recessed — this keeps the disc flush and prevents jamming. If your coin is very thin, a small washer works well.
For the masking flap, cut a thin rectangle of lightweight paper that will act as the veil hiding the coin. Glue one edge of that flap to the base just above the window so when the disc rotates the flap partly covers the slot. This soft veil helps the illusion: it conceals the coin while still allowing the illustrated panel to slide into view.
Assemble the pivot
- Poke a small hole at the centre of the disc and the matching centre on the base.
- Place the disc on the base, align the holes, and insert the brass fastener or split pin. Open the prongs underneath and flatten them, testing the rotation as you go. You want the disc to rotate freely but not wobble.
- If the disc is too tight, widen the hole slightly with the craft knife. If it’s too loose, add a small paper washer under the head to snug it up.
Design the tiny illustration
Now for the fun part: the hidden image. On the portion of the disc that will rotate into the window, paint or draw a tiny illustration. I like simple, bold shapes — a smiling face, a tiny magician’s hat, or a whimsical creature. Use opaque media (gouache, acrylic ink, or layered coloured pencil) so the image reads strongly at a small scale. If you prefer, print a tiny digital design and glue it to the disc.
Test and tune the motion
Place your coin into the well, rotate the disc so the coin is hidden beneath the flat part of the masking flap, and then spin the disc to see the reveal. You’re looking for a clean action: the coin should be unseen during rotation and the illustrated panel should align perfectly with the window when revealed.
Common adjustments:
- If the image doesn’t line up, mark the disc’s position while it’s aligned and re‑position the artwork or move the slot slightly.
- If the disc slips, make the pivot snugger with a paper washer or a dab of PVA under the head of the fastener (allow to dry before testing).
- If the masking flap lifts too much, glue a tiny weight (a bit of cardstock) to its tip to keep it lying flat.
Troubleshooting small problems
When I first started making these, my most frequent problems were wobble and misalignment. A steady hand and careful scoring help a lot. If the fastener keeps coming loose, crimp the prongs down firmly and add a little tape underneath to hold it. If the flap peels away from repeated use, replace the glue with a small strip of double‑sided tape for longevity.
Variations and playful ideas
- Double reveal: Make two windows on opposite sides of the base and paint the disc with two different tiny illustrations. Spin one way to reveal one image, spin the other way to reveal the other.
- Lightbox: Mount the mechanism inside a small box with a translucent paper front — when you spin, the image is backlit for an ethereal effect.
- Interactive postcard: Slip the mechanism into a folded card so the recipient discovers the coin‑hidden pop‑up when they open it.
- Automated turn: Attach a small rubber band between a notch on the disc and the base to create a self‑returning action — twist and let go for a playful spin.
Materials and brand notes
I often reach for Strathmore card stock for sturdy bases and Canson mixed media for disc work. For fasteners, small brass split pins from stationery shops are cheap and effective. If you want a very smooth pivot, look for tiny jeweller’s rivets or model‑making hardware from hobby stores like Hobbycraft (UK) or Blick (US).
If you make one of these, I’d love to see it. Post a photo on Instagram and tag @maxthemagician or share on the blog at maxthemagician.co.uk. Tell me what small twist you added — I always enjoy seeing how a little tweak can change the whole character of the trick.