I love making miniature water because it’s one of those deceptively simple effects that can transform a small scene into something believable and alive. Over the years I’ve settled on a workflow that pairs clear poured epoxy for depth and refractive clarity, with a separate rippling varnish finish on top to suggest surface movement. In this post I’ll walk you through the materials I use, the layering strategy, practical tips for painting the base, and ways to get convincing ripples without losing the pristine glassy look that epoxy gives you.
Why epoxy + varnish?
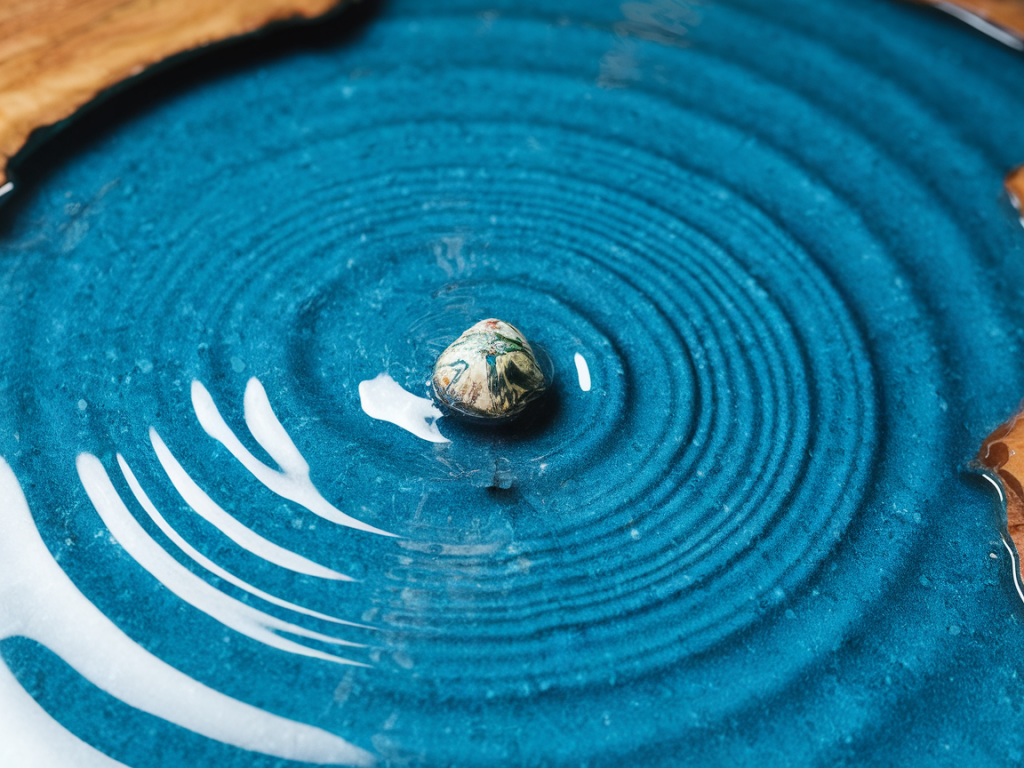
Epoxy gives you depth, optical clarity and the ability to embed objects (pebbles, sand, foliage). It refracts light like real water and once cured it’s solid and durable. But poured epoxy is usually perfectly flat and mirror-like; to suggest motion I add a thin top layer of gloss varnish that I texture into tiny ripples and micro-waves. Using varnish for the surface texture keeps the ripples crisp and low-profile — they catch highlights without creating unrealistic large waves that wouldn’t match the scale.
Materials I reach for
Here’s a practical list of what I keep in my studio. I name a few brands I’ve tested, but any good-quality alternatives will work.
Preparing the base: paint first, pour later
The magic of convincing water starts below the surface. Before pouring any resin I paint the base to suggest depth changes: darker tones in the middle (deeper water), lighter and warmer tones near the shore. I use thinned acrylics because they don’t react with epoxy and dry quickly.
Simple approach for a small diorama base:
Pouring the epoxy: layers and clarity
I never pour all the depth in one go. Layering epoxy reduces internal stress, limits heat generation (which can cause yellowing), and helps control clarity and inclusions.
| Layer | Thickness | Cure time before next layer |
|---|---|---|
| Base coat | 1–2 mm | 12–24 hours (tack-free) |
| Middle depth (repeat as needed) | 2–4 mm per layer | 24–48 hours |
| Final depth/top layer | 1–3 mm | 48–72 hours before varnish |
Mixing tip: follow the resin manufacturer’s ratios to the letter and mix slowly but thoroughly for at least 3 minutes, scraping sides and bottom of your mixing vessel. Slow mixing reduces bubbles. After pouring each layer I run a small heat gun or torch quickly over the surface to pop rising bubbles — sweep across at a distance, don’t linger in one spot.
Embedding elements
If you want pebbles, twigs or tiny plants in the shallows, place them on the painted base and pour a thin sealing layer (1–2 mm) over them first so they are locked in position. Then add deeper layers above. Embedding sea foam or small bits of cotton for surf? Wait to add those until the varnish stage — you can glue down tiny tufts and stitch them into the varnish ripples for realism.
When to varnish, and what varnish to use
Wait until the epoxy is fully cured (follow the brand instructions — usually 48–72 hours for thin layers). The surface should be hard and free of tack. A completely tacky or undercured epoxy will react with varnish and create cloudy or oddly textured results.
For the rippling finish I recommend a high-gloss acrylic varnish or gloss gel medium. Golden High Gloss varnish is a favourite for its clarity and leveling properties; Liquitex gloss medium also gives a good glassy finish and stays flexible. The idea is to apply a thin, even coat and then create texture while it’s still wet.
Creating ripples: techniques I use
Small scale equals small ripples. Here are my go-to methods:
Work quickly but calmly. Varnish levels out a little on its own, so you don’t want to build huge peaks — aim for micro-texture that catches highlights under gallery lights or natural daylight.
Finishing touches and highlighting
After the varnish has cured to the touch (usually a few hours to overnight depending on product and humidity), you can dry-brush tiny lines of thinned titanium white or cream right on the ridge of the ripples for sparkling highlights. I use a soft-bristled brush with a tiny amount of paint, then wipe most off on a rag before grazing the surface. This trick makes the ripples read at a glance without looking painted-on.
Common problems and how I fix them
Cloudy epoxy — often caused by moisture or incorrect mixing. Prevent it by keeping materials dry, mixing precisely, and working in a warm, low-humidity environment. If cloudiness appears after cure, a light sand (600–1200 grit) and a thin polish or final clear coat can sometimes restore clarity.
Dust or hairs trapped in varnish — remove as soon as you notice by carefully lifting with a piece of high-tack tape or a dampened soft brush before it cures. For embedded dust after cure, gently sand and recoat the area.
Large unwanted waves — they break scale. If your varnish texture is too bold, gently sand the peaks with fine sandpaper, clean, and reapply a much thinner varnish coat, then retouch with subtle ripple marks.
Safety and studio habits
Resins and some varnishes can release fumes. Always work in a well-ventilated area, use nitrile gloves, and wear a respirator rated for organic vapours if you’re doing frequent pours. Keep a clean bench and use tack cloths to reduce airborne dust. Label your mixed resin cups with the time you mixed them — epoxy has a limited work time and will heat up quickly if left in large masses.
Finally, experiment. I often make tiny test panels to try pigment mixes and ripple patterns at scale before committing to a big diorama. You’ll learn what brush sizes, comb teeth spacing and varnish brands give you the exact look you want.
If you want, I can share a short materials checklist you can print and stick to your workbench, or a PDF test-panel template with suggested mixes and ripple patterns. Tell me what size scene you’re planning and I’ll tailor the thickness and layer advice to your project.