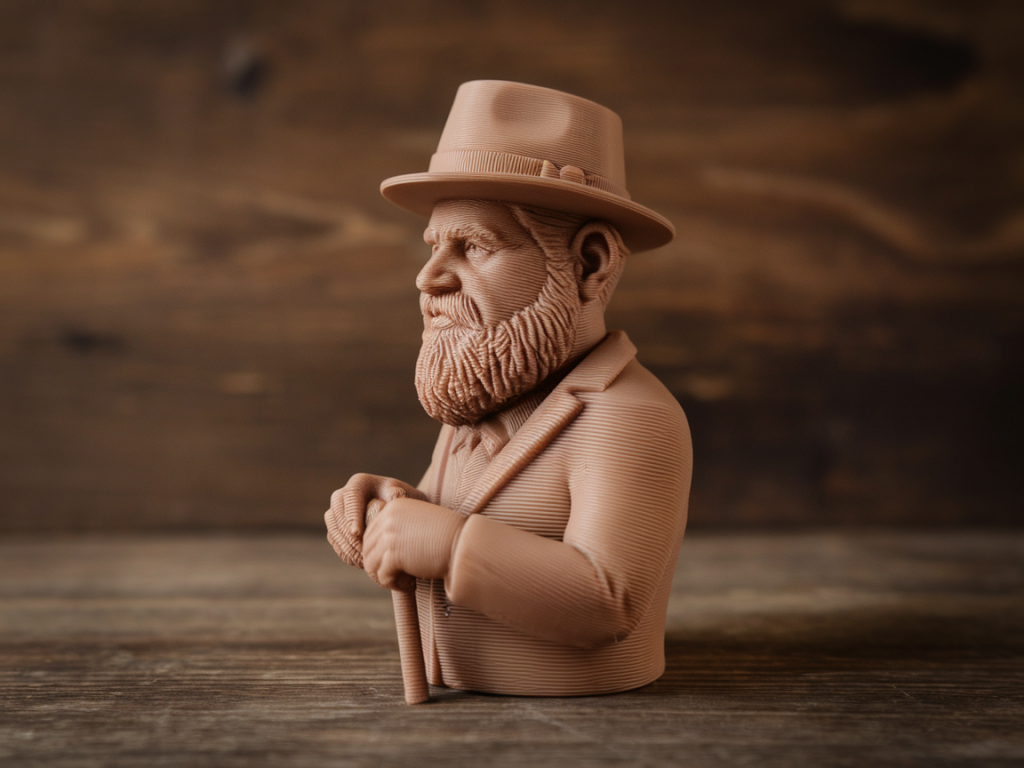
I love making tiny sculptures you can tuck in a pocket — little characters, talismans, quirky heads and miniature scenes that feel finished even at thumb-size. Over the last few years I’ve printed a lot of these, tested cheap filaments and pulled together finishing tricks that turn a raw print into something tactile and magical. Below I share what I’ve learned about which affordable filaments hold fine detail, how to print them for the best results, and simple finishing methods that make pocket sculptures sing.
Which cheap filaments actually hold fine detail?
Not all "cheap" filaments are equal when it comes to tiny features. The three that consistently give good detail for me are standard PLA, PLA+ / improved PLA blends, and PETG — though PETG needs more tuning. ABS and flexible filaments (TPU) have uses, but for crisp little faces and delicate hands I usually reach for PLA-family filaments first.
- Standard PLA — the go-to. Affordable, low-warp, easy to print at low temperatures and with good cooling. Brands I’ve used successfully: Hatchbox, eSun, Overture, and Prusament (Prusa’s supplier). PLA captures edges and tiny ridges cleanly when you use small layer heights and a well-tuned extruder.
- PLA+ (PLA Pro / tough PLA) — slightly modified formulations that are tougher and sometimes smoother. They can give comparable or better detail than standard PLA while being less brittle. Overture PLA+ and eSun PLA+ are budget-friendly options.
- PETG — tougher and slightly glossier, PETG can hold detail but tends to string and produce a softer edge if your cooling and retraction aren’t dialled in. I use PETG for tiny sculptures when I need extra durability (keychain myth: pocket sculptures that get knocked about).
- ABS — holds detail but warps more and releases fumes; also responsive to acetone smoothing (good for glossy finishes), but not the easiest for small amateur setups unless you have an enclosed printer and good ventilation.
- Specialty filaments (wood, metal-fill, silk) — fun surface effects but often less crisp on micro-detail due to particulates. Use them for texture rather than fine facial features.
Quick comparison
| Filament | Detail | Ease of Print | Finishing Options |
|---|---|---|---|
| PLA | Excellent | Very easy | Sanding, primer, paint, epoxy |
| PLA+ | Excellent to very good | Easy | Sanding, primer, paint, clear coats |
| PETG | Good | Moderate (stringing) | Sanding, primer, clear epoxy |
| ABS | Very good | Tricky (warping) | Acetone smoothing, sanding, primer |
Printer settings that make details pop
Even the best filament will look flat with default settings. For pocket sculptures I usually work with these parameters as a starting point:
- Nozzle size: 0.4 mm standard works fine, but if you want ultra-fine features try a 0.25 mm nozzle.
- Layer height: 0.08–0.15 mm. Lower layer heights make a big visual difference on small models.
- Print speed: Slow it down — 30–40 mm/s for small prints helps with accuracy.
- Cooling: Maximum cooling for PLA (fan 100%) after first few layers. This sets edges cleanly.
- Retraction: Increase retraction distance/speed to reduce stringing (tune per filament and extruder type).
- Temperature: Use the lower end of the filament’s recommended range for sharper layers (e.g., 190–205°C for many PLAs).
- Shells/perimeters: 2–3 perimeters is enough; increasing perimeters can crisp edges but hides fine negative spaces.
- Orientation: Orient the model to minimize support on visible faces. Prints look sharper when fine features are printed upright rather than slanted.
Finishing techniques for tiny sculptures
Finishing is where a printed object becomes a little object of delight. For pocket sculptures I favour methods that keep scale and texture intact while hiding visible layer lines.
Light sanding and primer
- Start with 220–320 grit sandpaper to remove blobs and flattened strings. For tiny recesses, use needle files or a micro-sanding stick.
- Use a thinned filler primer spray (3–4 light coats) to fill small layer lines. Once dry, sand lightly with 400–600 grit.
- Repeat primer + sanding once for very smooth finishes. This approach works great for PLA and PETG.
Gesso or acrylic skim
For a tactile, painterly finish I sometimes brush on a thin layer of gesso or heavy-bodied acrylic, wipe away excess in crevices with a paper towel, then paint over it. It preserves detail while evening out layers and giving tooth for paint.
Epoxy gloss or resin coating
A thin coat of clear epoxy (mixed carefully) creates a hard, glossy surface that makes tiny sculptures feel ceramic. Use only a small amount and rotate the piece to avoid pooling — this method adds weight and a professional sheen, and it seals porous primered surfaces.
Acetone smoothing (ABS only)
If you print in ABS, a quick acetone vapor bath smooths layer lines into a glossy surface. It’s dramatic but dangerous without proper ventilation — I avoid it in my studio unless I can do it outdoors with a respirator.
Patina, washes, and drybrushing
- Thin acrylic washes settle into crevices to emphasize detail — great for faces and textures.
- Drybrushing with a lighter color highlights edges and raised surfaces, instantly enhancing sculptural form.
- For a metal look, use metallic paints, then glaze with a dark wash to age and reveal tiny forms.
Practical tips from the pocket
- Keep a stash of 0.25–0.4 mm nozzles. Switching to a finer nozzle for key prints makes a real difference.
- Print multiples at once with slightly different orientations to find the best result — tiny tweaks in angle change overhangs and visible layer direction.
- Glue is your friend: superglue for snapped bits, PVA for porous finishes and to fill micro-gaps (sand after drying).
- If you want a warm, hand-made finish, don’t over-smooth. A few visible layer lines can make a tiny sculpture feel like an object someone actually made by hand.
If you’d like, I can walk you through a specific pocket-sculpture workflow: choosing a filament, slicing settings tuned to your printer, and a short finishing sequence for a particular aesthetic (matte painted talisman vs glossy ceramic-style figure). Tell me what look you’re after and what printer and filaments you have, and I’ll tailor the steps.