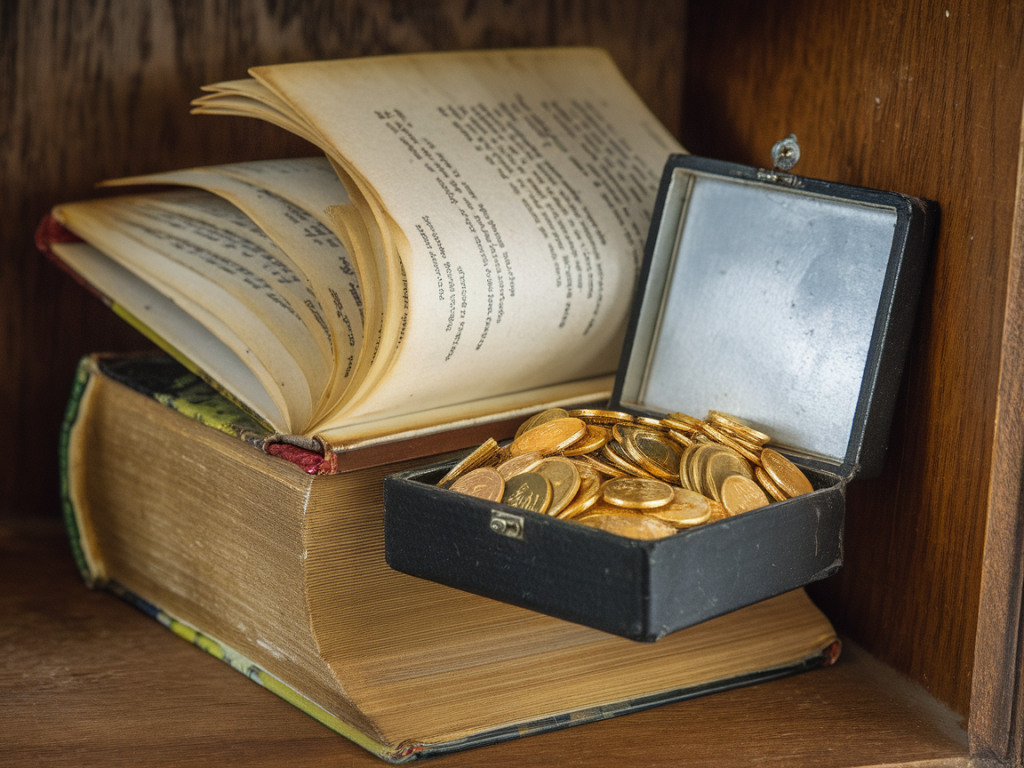
I love finding small ways to turn ordinary objects into pockets of surprise. One of my favourite quick transformations is turning a cheap secondhand paperback into a hidden-compartment prop — perfect for pocket-sized theatre, street magic bits, or a tiny stage for a character to hide and reveal miniature curios. In this post I’ll walk you through a straightforward method that keeps the book looking believable while creating a neat little cavity for tiny props, notes, or mechanical surprises.
Why use a secondhand paperback?
There are a few reasons I reach for a thrifted paperback for this kind of project. First, the cost: you can usually pick up a book for very little or even free. Second, the patina and wear actually help the prop read as authentic on stage or in a photograph. Finally, paperbacks are flexible and forgiving when it comes to cutting and glueing — you get a clean hollow without bulky bindings getting in the way.
Materials and tools
Here’s everything I keep on hand for this project. Most items are inexpensive and easily sourced:
Tip: A fresh blade makes clean cuts and reduces the risk of tearing the pages. Safety first — cut away from your hand and use a stable cutting surface.
Choosing the right book
Not every paperback is equally suited to becoming a prop. Look for a book with a soft, flexible cover and pages that aren’t too friable. Novels with about 150–300 pages are great: thick enough to create a deep well, but not so thick you need to cut forever. Avoid books with glossy, laminated covers if you want a more natural, worn aesthetic — unless that glossy look suits the character of your piece.
Preparing the book
Open the book and decide how much of the interior you want to hollow out. I usually leave a margin of about 10–12 mm (3/8–1/2 inch) from the edges so the hollow looks convincing and the book remains structurally sound.
Mark a rectangle lightly in pencil on the top page. Use the metal ruler to make sure lines are straight. Think about how deep the compartment needs to be — if you want to hide a tiny mechanical element, make the cavity deeper but remember you’ll use multiple cuts and remove pages gradually.
Cutting the pages
Clamp the book closed (or wrap the cover in waxed paper and use a heavy weight or rubber bands) so the pages stay aligned. I often put waxed paper between the cover and the pages to protect the cover from glue later on.
Using the ruler as a guide, make the first shallow cut along the pencil lines with your craft knife. Don’t try to cut through the entire block of pages in one go — you’ll get a cleaner result by removing small sections at a time. I cut about 10–20 pages per pass for a tidy edge and to avoid blade drift.
After removing the first set of pages, re-clamp and repeat until you reach the desired depth. Keep the removed pages — you can use them later as filler or to line the interior.
Gluing the inner block
Once you have a neat cavity, brush a thin layer of PVA glue onto the inside faces of the remaining pages (the sides of the hollow) and along the outer edges of the book block. Don’t soak the pages; a thin, even coat is enough to hold the pages together and stabilise the structure.
Press the book closed with waxed paper protecting the cover and clamp it under a stack of heavy objects. Allow the glue to dry fully — overnight is best. When dry, the book should feel like a solid block with a hidden interior.
Refining the interior
The raw cut can look a little rough; I like to line the cavity with decorative paper or paint for a polished feel. If you want a Victorian pocket-theatre vibe, glue in an aged-looking endpaper or tea-stained paper. For a more utilitarian magician’s prop, black craft foam or velvet will help conceal small items and eliminate shine.
For extra durability, cut a piece of thin cardboard or foam core to fit the bottom of the cavity and glue it in place — this gives you a flat stage inside the book and hides the cut edges beneath.
Creating a secret latch or invisible compartment
If you want the compartment to be more theatrical — a springy reveal or a false-bottom — you can add mechanical elements:
When I want a smooth, magician-friendly reveal, I often use a thin piece of card attached to a length of invisible thread. A gentle tug lifts the card and exposes the object with a little theatrical flourish.
Finishing touches and disguise
The trick is to make the book look untouched. Lightly rub the edges with a sanding block or just your thumb to blend new cuts with existing wear. If the new inner pages look too stark, tea-stain or ink the edges to match the book’s age. Re-glue or replace the endpapers so the book opens and reads like a normal paperback.
Consider the book’s role in your pocket theatre: will it be handled closely by the audience, or glimpsed from a little distance? For up-close work, tidy edges and soft linings are worth the extra time. For distant props, a rougher finish can be charming and more practical.
Ideas for performances and uses
Here are some small ways I’ve used these hollowed books in my work and classes:
Troubleshooting common issues
If pages shift during cutting: clamp more securely and use waxed paper between the cover and the pages to prevent glue transfer later.
If the cavity looks uneven: sand the edges gently and line with paper or fabric to hide imperfections.
If the book feels flimsy after hollowing: add a cardboard reinforcement to the back or glue the outer edges more heavily, then press until dry.
Making a hidden-compartment book is one of those small alchemical acts I adore: a modest thrift-store object becomes a secret stage, a vault for a tiny story, a mechanical laugh. It’s cheap, satisfying, and endlessly adaptable — and a lovely way to add a moment of wonder to a pocket-sized performance. If you try it, tell me what you hide inside; I love hearing about the little theatrical ecosystems people invent.