I love a small, tactile trick — something that makes a viewer pause and tilt their head, then smile when the hidden thing is revealed. This project is one of my favourites for that exact reason: a magic picture frame that looks like a normal framed picture until you slide a hidden panel and an illustration appears or changes. It’s simple, playful, and uses humble materials like card, lightweight wood or store-bought frames, and a little paper engineering. I made my first version on a rainy afternoon with paint-splattered hands and a stack of old postcards; since then I’ve refined the mechanism so it’s robust enough to hang on a wall but still quick to assemble.
What this project does and who it’s for
This is a step-by-step build for a frame that reveals a hidden illustration via a sliding inner panel. It’s great for:
- gift cards that transform into a secret scene
- small gallery pieces that change when viewers interact
- kids’ projects where the reveal is part of a story
- makers who like mixing illustration with simple mechanics
You don’t need advanced tools — a craft knife, glue, and a basic frame will do. I’ll point out optional upgrades if you want something more polished or durable.
Materials and tools
Gathering good, accessible materials makes the process joyful. I often use local art-shop supplies or online favourites (I’ve had luck with Blick and local craft stores). Here’s what worked well for me:
| Item | Suggested size/notes |
| Picture frame | 8x10 or A4, with removable back and a little depth (1–2 cm) |
| Thick greyboard or mountboard | for the sliding panel and backing (approx. 2–3 mm) |
| Thin card or paper for illustrations | 140–300gsm paper, or watercolour paper if painting |
| Glue | PVA/white craft glue and a stronger adhesive like double-sided tape |
| Craft knife & metal ruler | for clean cuts |
| Cutting mat | protect surfaces |
| Optional: small dowels, magnets or ribbon | for smoother sliding or pull-tab |
How the mechanism works (simple explanation)
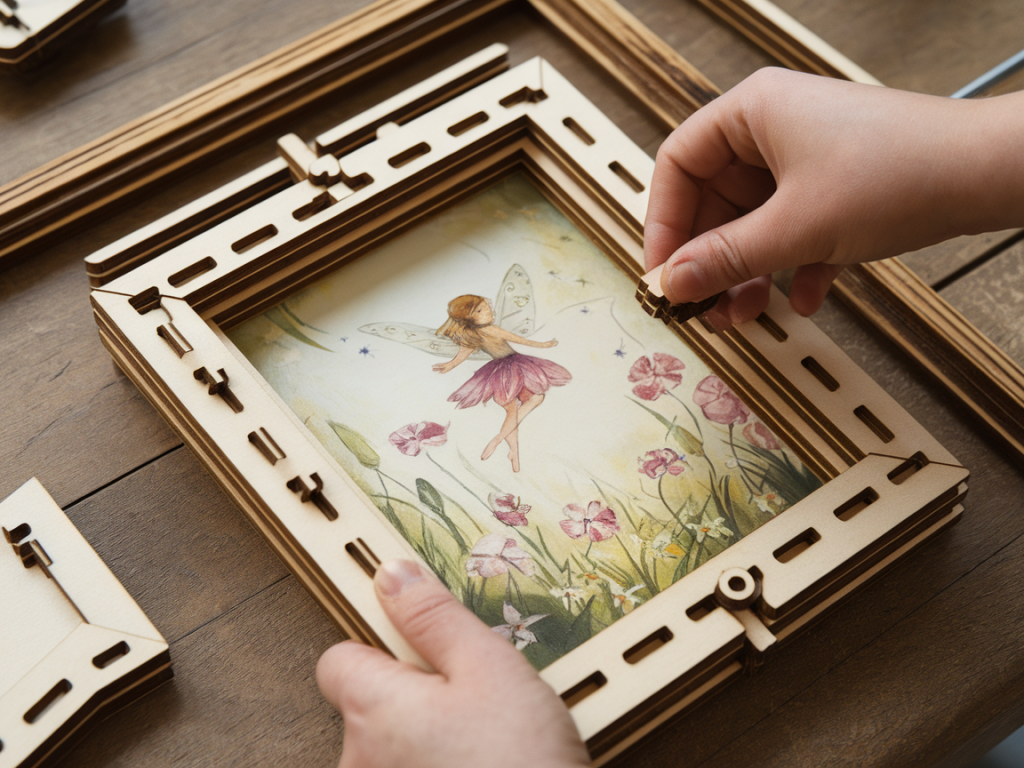
At its heart this is a sliding reveal. The frame holds a fixed outer layer — the visible picture — and a concealed inner panel that slides horizontally or vertically to reveal the hidden illustration. Think of it as a very thin drawer sandwiched in the frame. The trick is to give the sliding panel just enough clearance to move smoothly, while keeping the edges hidden when it’s closed.
Step-by-step build
Follow these steps in order. I recommend testing fit as you go rather than cutting everything at once.
- Remove the back of the frame. Take out any glass or acrylic if your frame allows (you can also work with the glazing in place; I sometimes replace glass with a lighter acrylic sheet to reduce weight).
- Create the backing board. Cut a sheet of greyboard to match the frame’s internal dimensions (width x height). This will be the support behind your visible picture and the track for the sliding panel.
- Design and prepare the visible picture. This is the artwork that appears before the reveal. It could be a painted scene with a blank window, a printed illustration, or collage. Make sure to leave a margin where the sliding panel will pass behind or in front — you don’t want the seam obvious. Attach this visible image to the front of the backing board with double-sided tape or PVA, taking care not to misalign it.
- Make the sliding panel. Cut a second piece of greyboard slightly narrower than the internal width of the frame and the same height as the backing board. The panel length depends on how much you want to reveal: a full-width panel that slides fully out, or a smaller insert that moves a short distance. I typically make the panel 2–3 mm narrower than the frame interior so it moves freely.
- Attach the hidden illustration to the panel. Fix your hidden drawing or print to the face of the sliding panel. Ink, gouache, collage or a crisp digital print all work well. If you want a two-stage reveal, you can glue two different images on opposite sides of the panel.
- Add a pull-tab or handle. For ease of use, glue a small ribbon or a sliver of card to the edge of the sliding panel. If you prefer something invisible, drill tiny holes and glue a wooden dowel stick between the layers as a concealed grip.
- Fit guides/tracks (optional but recommended). To keep the panel steady, glue narrow strips of card along the two long inner edges of the backing board to form shallow channels. These act like rails and keep the slide from rattling. Make them slightly shorter than the panel height so they remain invisible from the front.
- Test the slide. Place the sliding panel into the channel and practice opening and closing it. Sand the edges gently if it sticks. Add a tiny dab of wax or a dry lubricant if needed, but avoid oils that might stain paper.
- Reassemble the frame. With everything fitting smoothly, place the backing board with the slide into the frame. Secure the back — you can use the original frame tabs or glue a thin strip of card to hold it firmly. If you want the sliding action accessible from the front, leave a small notch in the bottom mat or bevel the frame’s insert for a discreet finger space.
- Finish and decorate. Paint the frame edge, add a small label, or rub a little patina. If the piece is a gift, write a note on the back giving instructions like “slide gently to reveal the secret.”
Tips from my studio experiments
- Test different clearances: I usually start with a 2–3 mm gap and adjust. Too tight and it binds; too loose and it rattles.
- Make the visible image forgiving: Introduce a printed pattern or vignette near the edges to mask any tiny gaps.
- Use magnetic catches for a satisfying stop: A small magnet or magnetic tape inside the frame can create a soft click when the panel reaches the reveal position.
- Layered reveals: For a playful animation, build two thin sliding panels that move at slightly different distances — the difference creates a staggered reveal, like a flip-book in still life form.
- Weatherproofing: If you plan to hang the piece in a humid room, seal the paper artwork with a light spray fixative to prevent buckling.
Troubleshooting common problems
Here are a few things I’ve wrestled with and how I solved them:
- Panel sticks: Sand the panel edges lightly with fine-grit sandpaper, or reduce the width by 0.5–1 mm.
- Visible seam: Add a thin printed border or a painted trim to disguise the join.
- Rattling: Glue micro strips of felt into the channels to cushion the panel.
- Uneven movement: Check that guides are parallel — a crooked channel will jam. Re-adhere or replace guide strips if needed.
Variations and playful ideas
Once you’ve made one, the variations are endless. Here are a few directions I like to explore:
- a night-to-day reveal using translucent paints and a dark inner panel
- a “peekaboo” portrait where the inner panel shows the subject with different expressions
- a set of small framed cards that together form a narrative when each is revealed in sequence
- combine with simple LEDs for a light-up reveal (use coin cell batteries and tiny switches)
If you try this, I’d love to see what you make — tag a photo on Instagram and mention @maxthemagician or drop a note via the contact page at maxthemagician.co.uk. Making a frame that hides a secret is one of those projects that invites tweaking and personal touches; every little adjustment makes it feel more like you. Happy building — may your next glance be full of delight.