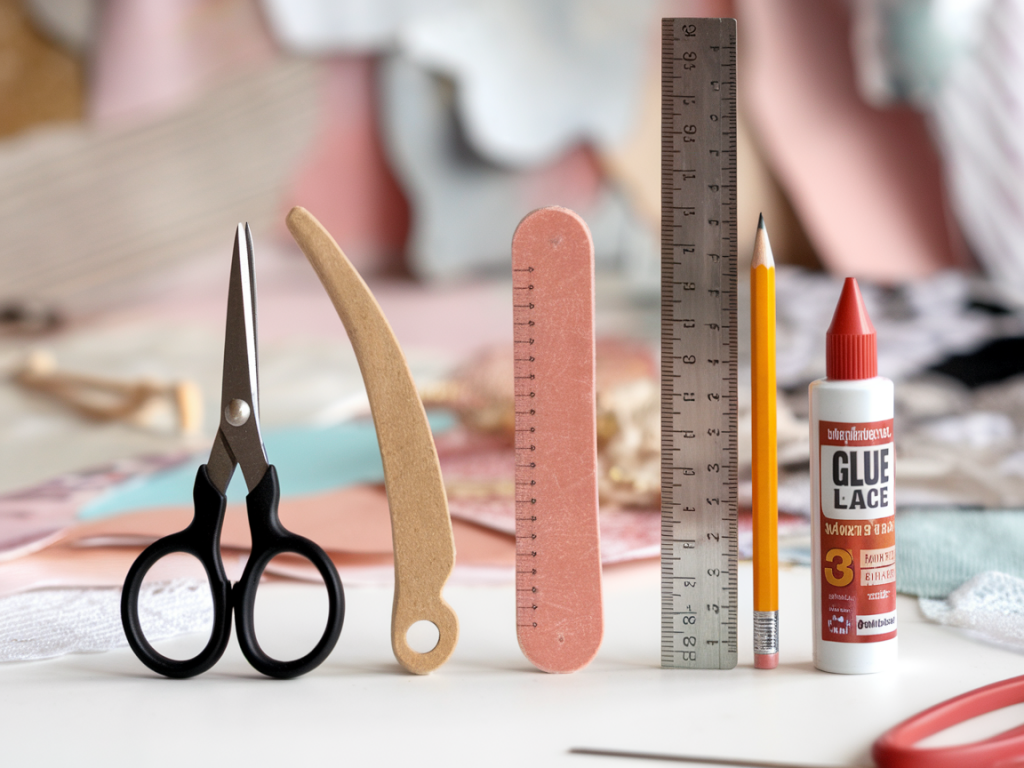
I used to think collage was just cutting and sticking — a happy mess of paper and glue. Over the years I’ve learned that a handful of small, inexpensive tools can quietly transform that mess into something much more deliberate and, yes, a little magical. These are the tools I reach for in the studio when I want tidy edges, crisp folds, and layered surfaces that sit exactly where I imagine them. They don’t cost much, but they change how you work.
Bone folder (or a plastic folder)
I can’t overstate how often a bone folder saves a collage. It’s that simple tool you use to make crisp creases, smooth down glued edges, and burnish delicate bits so they sit flush against the page. I use one made from polished plastic (they’re cheap and indestructible), but traditional bone or Teflon folders work just as well.
How I use it:
Tip: Clean the folder occasionally with a soft cloth. If adhesive builds up, a little isopropyl alcohol on a cloth will remove it.
Craft knife + self-healing cutting mat
A sharp craft knife and a self-healing mat are the pair that make precise cuts possible. Scissors are great, but for inlaid collage, crisp windows, and delicate negative shapes, a knife is indispensable. I keep an Olfa-style knife with snap-off blades on my desk and replace the blade the moment it drags.
How I use them:
Safety and maintenance: keep the mat clean and rotate it to distribute wear. Replace blades often — a fresh blade is safer because it’s less likely to slip.
PVA glue (or Mod Podge) and a small brush/silicone spreader
I have a soft spot for glue. A good white PVA (acid-free if you care about longevity) is the workhorse: affordable, strong, and forgiving while you reposition pieces. Mod Podge is a handy alternative when you want a single-product glue-and-seal finish. Whatever you choose, the right applicator matters. I prefer a small synthetic brush or a silicone spreader for even coverage without puddles.
How to use it well:
Personal trick: keep a small scrap of silicone baking paper on hand. If two pieces accidentally stick, you can slide the paper between them to separate without tearing.
Double-sided adhesive (tape runner or thin adhesive squares)
When I want instant adhesion without the wrinkle risk that wet glue can introduce, I reach for a tape runner (Tombow Mono Adhesive or a basic ATG-style tape are affordable options) or thin double-sided adhesive squares. They’re perfect for tiny collage bits, vellum overlays, or when you’re working with materials that would warp under wet glue.
How I use adhesive tape well:
Note: some tape runners can be difficult to remove from archival work. For museum-quality pieces, look for acid-free tape products like lineco or archival adhesive tabs.
Fine tweezers / micro spatula
Small hands? Mine too — but sometimes a pair of fine tweezers or a micro spatula does the job better. These are the tools I use to place tiny bits, lift delicate paper without bending it, and tuck edges neatly under other layers. A cheap pack of stainless steel jeweler’s tweezers will serve you brilliantly.
Practical uses in the studio:
Storage tip: keep them in a small magnetic strip or a tray so they don’t get bent or lost among scraps.
A quick comparison table
| Tool | Main use | Why inexpensive wins |
| Bone folder | Creasing, burnishing | Durable, small impact on budget, huge finish improvement |
| Craft knife + mat | Clean cutting, apertures | Precision that elevates a piece; blades are cheap to replace |
| PVA / Mod Podge + brush | Bonding and sealing | Versatile; covers many stages from assembly to finish |
| Double-sided adhesive | Instant, flat adhesion | Fast, tidy, and avoids warp from moisture |
| Tweezers / micro spatula | Placement of small elements | Precision without damaging materials |
These five tools have become part of my ritual: I tidy them on my workbench before I start, like a magician arranging props. They make the messy bits manageable and the deliberate bits crisp. They don’t replace intuition or playful accidents — I still love those — but they let the accidents look intentional when they need to. If you’re building a starter kit for collage, pick up a bone folder, a small craft knife and mat, quality PVA or Mod Podge, a tape runner, and a pair of tweezers. Together they’ll help you spend less time rescuing torn corners and more time exploring the stories you want your collages to tell.